How I finally got a Python Flask app installed on Cpanel

In summary:
1. Check versions! Of Python, Flask and Jinja
2. Read this really useful tutorial https://dev.to/lordghostx/how-to-host-flask-applications-on-namecheap-cpanel-299b (Thanks LordGhostX)
Okay so I’ve been meaning to figure this out for a while. Flask is a good library for letting students use the power of Python as a back end to the graphical niceties of HTML,CSS and Javascript. But we’ve been stuck to using it on Replit or Glitch which, being public sites, aren’t ideal for students who are doing their final year project and suffer the other issues of remotely hosted IDEs. So I was always interested in finding another way.

In CPanel’s Applications > Python Application window, click Create Application
On the first screen, before you do anything else, change the Python version to 3.9.x (not 3.10.x that didn’t work for me at first, and then later when I realised it was a problem with the Flask version I was too superstitious to change it. Try it if you want but I’m sticking to this as it seems to work!)

Application Root: Add the name of the folder in your home directory (you can either create blank one first or it will create it for you when you submit this form) I’ve called mine pythonapp3
Application URL: Give your application a Name – this is the path for your app (or the whole domain if your making your whole website devoted to your Flask app, you flash thing) Again I’ ve called mine pythonapp3
Application start up file: needs to be passenger_wsgi.py (I’m not entirely sure why but it was in LordGhostX post, so I’m going to stick with that. I suppose it could be anything though as you are the one specifying the name…)
Application entry point: This is the name of the object you’ll be using in your code (I think) so use the word “Application”
Then click CREATE APPLICATION
If all is well, and no errors appear it should look like this:

This shows its running and if you click OPEN you can see what a vanilla Python app looks like.

Right… not ideal. Back to Cpanel
Just as an aside, how do you see what errors are being generated? Well in your newly created folder on Cpanel you will see a stderr.log file.

But we’re not going worry about these errors when there’ll probably be a whole bunch of other errors to deal with later!
Create a new file called requirements.txt in your folder and put the following lines
Flask
Flask==2.0.2
jinja2==3.0.3
Create another new file called app.py in your folder and put this basic Flask starter code
from flask import Flask
app = Flask(__name__)
@app.route("/")
def hello():
    return "Hello World!"

@app.route("/<string:name>/")
def say_hello(name):
    return f"Hello {name}!"

if __name__ == "__main__":
    app.run()
Obviously you will be making this file so much more awesome later but it’s a good first step
Requirements.txt is a way of specifying what version of what libraries Python needs. So we need to “load” it into Cpanel first.
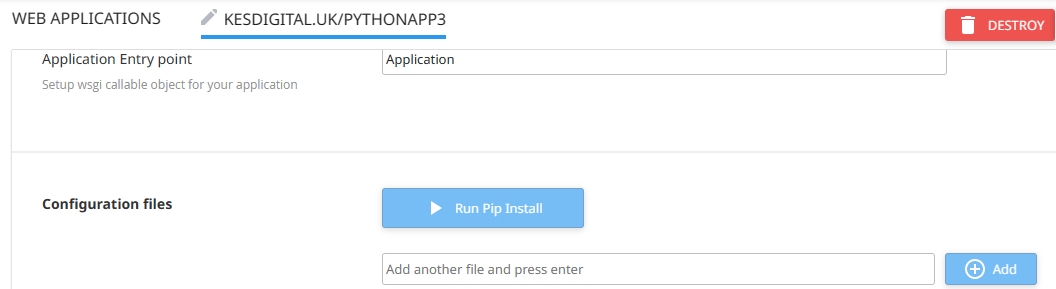
In the configuration files section, type “requirements.txt” in the box and then click Add
You should now be able to click the Run Pip Install button, choose requirements.txt the dropdown, and then after a short wait you should get a success message like so:

Edit the passenger_wsgi.py file (which was created automatically for you when you first clicked Create Application) so it just has this one line in it:
from app import app as applicationRestart your application….and try accessing your new website via its URL


Woo hoo!
I’m still learning about Flask myself so here are a few tutorials that may be of use:
https://blog.miguelgrinberg.com/post/the-flask-mega-tutorial-part-i-hello-world << this one was the one I used
https://flask.palletsprojects.com/en/2.2.x/tutorial/
https://realpython.com/tutorials/flask/
I hope you found this useful!